Top training tips on how to improve on the driving range.
It’s amazing how many people want to improve their game by going to a golf range near them and spend less than an hour bashing 100 balls and wonder why they cannot repeat the same results on the golf course. Here are our top tips for getting the most out of your practice sessions-
1. Practise like the Pros
If you have ever seen the pros warming up or practising, you will note that they have a deliberate practice routine which normally includes the following-
- Stretch and loosen up before hitting balls (both to warm up and avoid injury)
- Use of alignment sticks and other aids. Poor alignment is a very common problem that leads to lots of bad adjustments in your swing. It is also hard to judge if you are properly aligned, hence the need to always ensure you are aligned correctly (feet, hips and shoulders)
- A deliberate routine normally starting with the small clubs such as wedges, gradually building towards the driver. This is mainly because tempo is so important to a good swing and it is far easier to establish this with smaller clubs. Further, any swing faults you bring to the practise range on a given day will be magnified with a driver. Even the Pros know they never really have a ‘perfect’ golf ball flight, so rectifying problems early with the small clubs is far easier than fighting your driver swing
- Target-based practise-just hitting balls down the range is meaningless when it comes to real golf where every shot is different and you always have a target in mind. Try to rectify this in practice, regularly changing your target, going through a deliberate pre-shot routine and keeping your target in mind as a swing thought, just as you would do on the course
2. We learn much better from variability training, not repeating
Here is a summary of the results of one of many studies on how we learn best (from John Hopkins University)
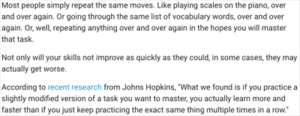
So, hitting a hundred balls down the driving range near you, in the same manner, is not really a useful way to learn. Because of the repetition, you will get into a rhythm using small adjustments to get the most out of your shots and ignoring your faults (through small compensation moves), which can be repeated immediately. However, this will not work on the course where there is a natural delay between every shot. Instead, we learn much better by adjusting the task or what we are trying to do.
Some examples are –
- Experiment with hitting the ball on the toe and the heel of the club to better learn how to find the middle of the club. Get to know what a toe strike feels like and even better, how to adjust it to a centre strike, so you will know how to do this on the course. This is also the best way to cure the dreaded ‘shanks’ if they ever appear on the golf course-simply know how to hit the ball more towards the toe (as a shank is caused by a heel strike)
- Do the same with fat and thin shots, learn how to hit the ball thin (low on the face) on purpose and then see what fat (high on the face) feels like. This would be best done on real turf for the reasons explained above under golf practise range mat training
- Do the same with your ball flight, try to learn how to fade and draw the ball. Open your stance and close it, do the same with the clubface. The internet is full of technical training, which is beyond the scope of this article, but by learning these skills you will know how to adjust your swing on the golf course when, all of a sudden, an unwanted slice appears
- Do not try to get 1 ‘perfect’ repeatable ball flight only. By learning to hit the ball high and low with different clubs, you will be far more effective in finding your desired flight on the course when needed. Naturally, this will make you a much better wind player as well.
3. Video your swing
There is a saying in golf that ‘feel is not real’ which is true. You might be working on something technical such as ‘shallowing the club’ and think you are doing a good job. However, when you look at actual video footage, you will be disappointed to see that the club is, in fact, far too steep.
As a generalisation, we must greatly exaggerate new moves to even partly integrate them into our swings, as our body is determined to return to its previously learned ‘norm’ and resists changes that we ‘think’ we are making. A classic example is overswinging which many amateurs struggle with. Generally, in order to take a ‘normal’ backswing they have to feel like they are only swinging halfway back (to left arm parallel) to correct this. They will be amazed to see on video that their impression of a half swing was actually a full swing.
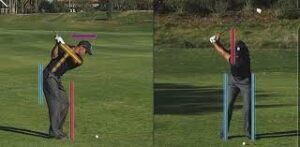
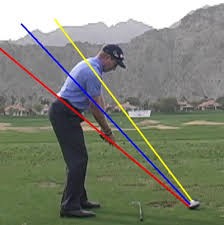
Here are our main recommendations for how to best video your swing-
- Get a mobile/tablet app that allows you to draw lines on your device video footage. There are many options out there, such as the V1 app
- When filming down the line (i.e. behind you), place the camera about waist height on your elbow line (i.e. directly behind your elbow as you address the ball). From the front view, again place the camera at waist height in the middle of your stance
- There are various lines and methods to analysis your swing depending on what you are working on and again, there is a lot of such technical help on the internet. Here are our favourites
Down the line view
- Place a line from the ball through your elbow (like the blue line in the picture above, or slightly lower touching the bottom of the elbow). Use this to make sure your clubface stays on or outside the line on the takeaway (to halfway back) and the opposite on the way down, preferably under the line for a shallower approach into the ball
- Place a line on your rear end to make sure you are not early extending in either your backswing or downswing-i.e. your rear end should not leave the line and encroach towards the ball during the swing
- Place a line over your head to make sure you are not ‘standing up’ in your backswing and that you dip below the line at the start of your downswing/early transition (the ‘Rory’ move)
- Make sure your shoulder plane is steep enough at the top of the backswing (like the yellow line perpendicular to the spine in the picture), as many of us get too ‘flat’ on the backswing
Face on View
- Draw lines around your hips and ensure you do not sway back outside the rear hip line on your takeaway (ideally, at the top of the backswing you should have created about a ball gap by moving slightly TOWARDS the target). Most of us, unfortunately, tend to sway the wrong way, away from the target
- Your forward hip will push through its line on the follow-through, but it shouldn’t be by more than about a half a leg. Pushing the hip through too much is a sure-fire way to long term hip pain-we should be swinging around our pelvis, not pushing it through as many do.
- Make sure your head more or less stays within its space throughout the swing. Pros will generally move slightly back on the backswing and maybe even more back and lower at the end of their downswing as their lead leg pushes them back through impact like Justin Thomas in the picture below.

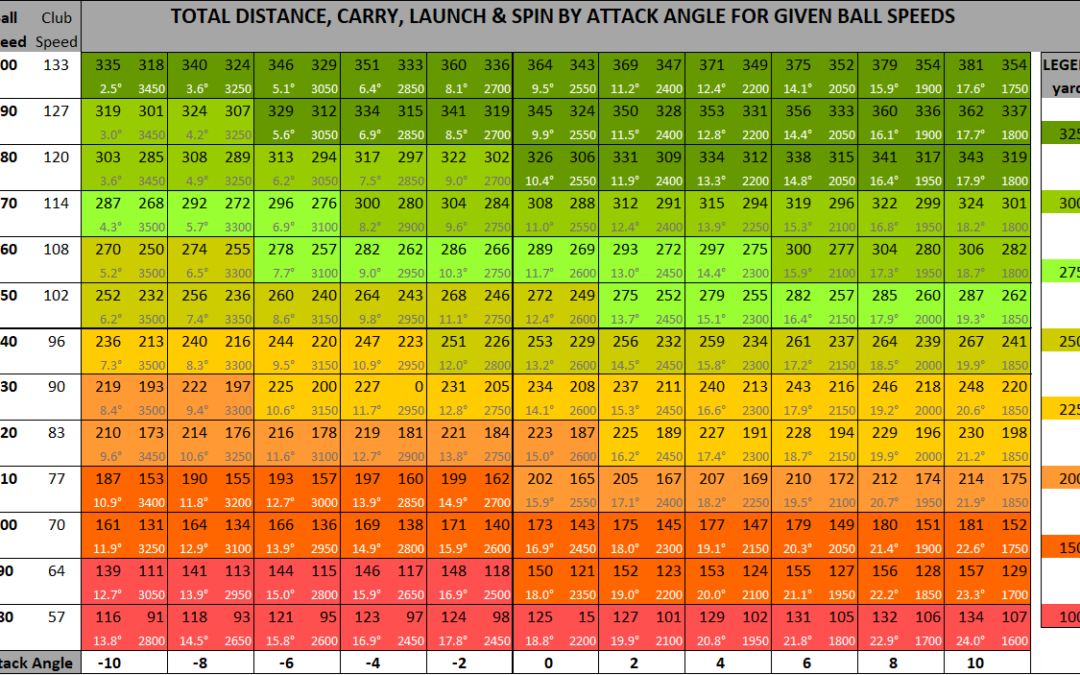
Here is a good guide to home practice mats from mygolfspy for those setting up at home







0 Comments